Before I let Gabby take it away, I want to let you know that YES I am alive and I miss you all. Life has been pretty crazy but I will catch you up soon :) Hopefully with all of the snow we are supposed to get, I will have some spare time to write! And before you read the amazing tutorial that Gabby has for you, I just want to say that she has been such a blessing in my life. I got a permanent smile after opening this package and she never ceases to amaze me. She is always encouraging me and I am so thankful for her :) Sorry for all of the mushiness....it is Valentine's Day week after all!!
If you missed Gabby's 1st post on quilting, check it out here!
Hi Readers! I’m back! I’m really excited about my latest DIY because it was a spur of the moment
project brought on by a JoAnn Fabrics trip. Meet my inspiration: fuchsia and fuchsia polka dot burlap
material! Love love love!
I was randomly walking through aisles and the material caught my eye. Then I noticed it was 30%
off. I knew it was coming home with me and I knew something Valentine’s Day related was going to be
involved. By the end of my shopping trip I had a basket full of stuff and tons of ideas. The one that stuck:
Valentine’s Day goody bags for my sisters!
Next stop:
Pinterest! (sigh…I love
Pinterest…) As I was searching I found some really great ideas, so I
decided to combine a few of them.
katiesrosecottagedesigns.com Etsy Shop:
BirdintheWoods studiocalico.com
To start I had to make a trip back to JoAnns and Michaels to pick up some cool V-Day related
stickers, paper and stamps. I found a heart shape online to get the right size and traced the burlap to
cut it out with the word design I wanted. I had to be careful as I was cutting because burlap frays really
easily.
I started sewing the heart shaped buttons and glued the edges together with fabric glue. I left the
top open so I’d have room to shove the stuffing in. Make sure you give the glue plenty of time to dry (I
let it go overnight). This will help keep the burlap from fraying!
After that I decided to do a gold blanket stitch, I just Googled blanket stitch and a bunch of tutorials
came up. I stitched the edges, added the stuffing, and then stitched them up! NOTE: I started with gold
thread, but I was trying to use several strands to make the stitches more pronounced. THIS WAS WAY
TOO DIFFICULT. Try gold yarn instead.
The last step was
hot gluing the flower
embellishments and the gold ribbon loops. I let them dry about 10 min and they were ready to go!
I also made these cute little frames with Valentine’s Day stickers I bought, random cardstock I had
laying around the house and little frames from Michaels. It’s a great little decoration for your work desk
or kitchen. Maybe $3 each tops!
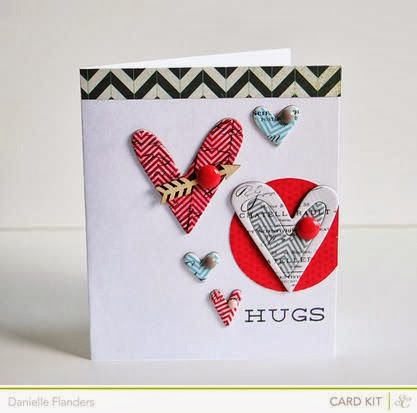
To top it all
off I made
some cards to
send out with
the pink
letters I found
at JoAnns
and
cardstock I had from previous projects. The heart stickers I found at Michaels. Just cut, glue and stick! I
have a “Homemade by” stamp, so I decided to put them on the back of the cards. After I sealed them in
their envelopes I sealed them with a stamp I got at Michaels for $1.50!
Look at these cool mailers I found at Target! I made the heart labels with the Hallmark Card Studio
software my husband gave me for Christmas last year!
I decided to make a CD of my favorite Christian songs to send in the package too. I’ve been listening
to KLove radio station on the way to work, and it’s been so uplifting! Plus what better way to celebrate
Valentine’s Day than with a reminder of God’s love!
I love to send little things in the mail, so I thought these would be awesome gifts to send to family
just to say “I’m thinking of you”!
It’s amazing what a girl can do when she’s snowed in. :)
Happy LOVE Day, until next time!
My goodies are sitting proudly at my office desk :)


